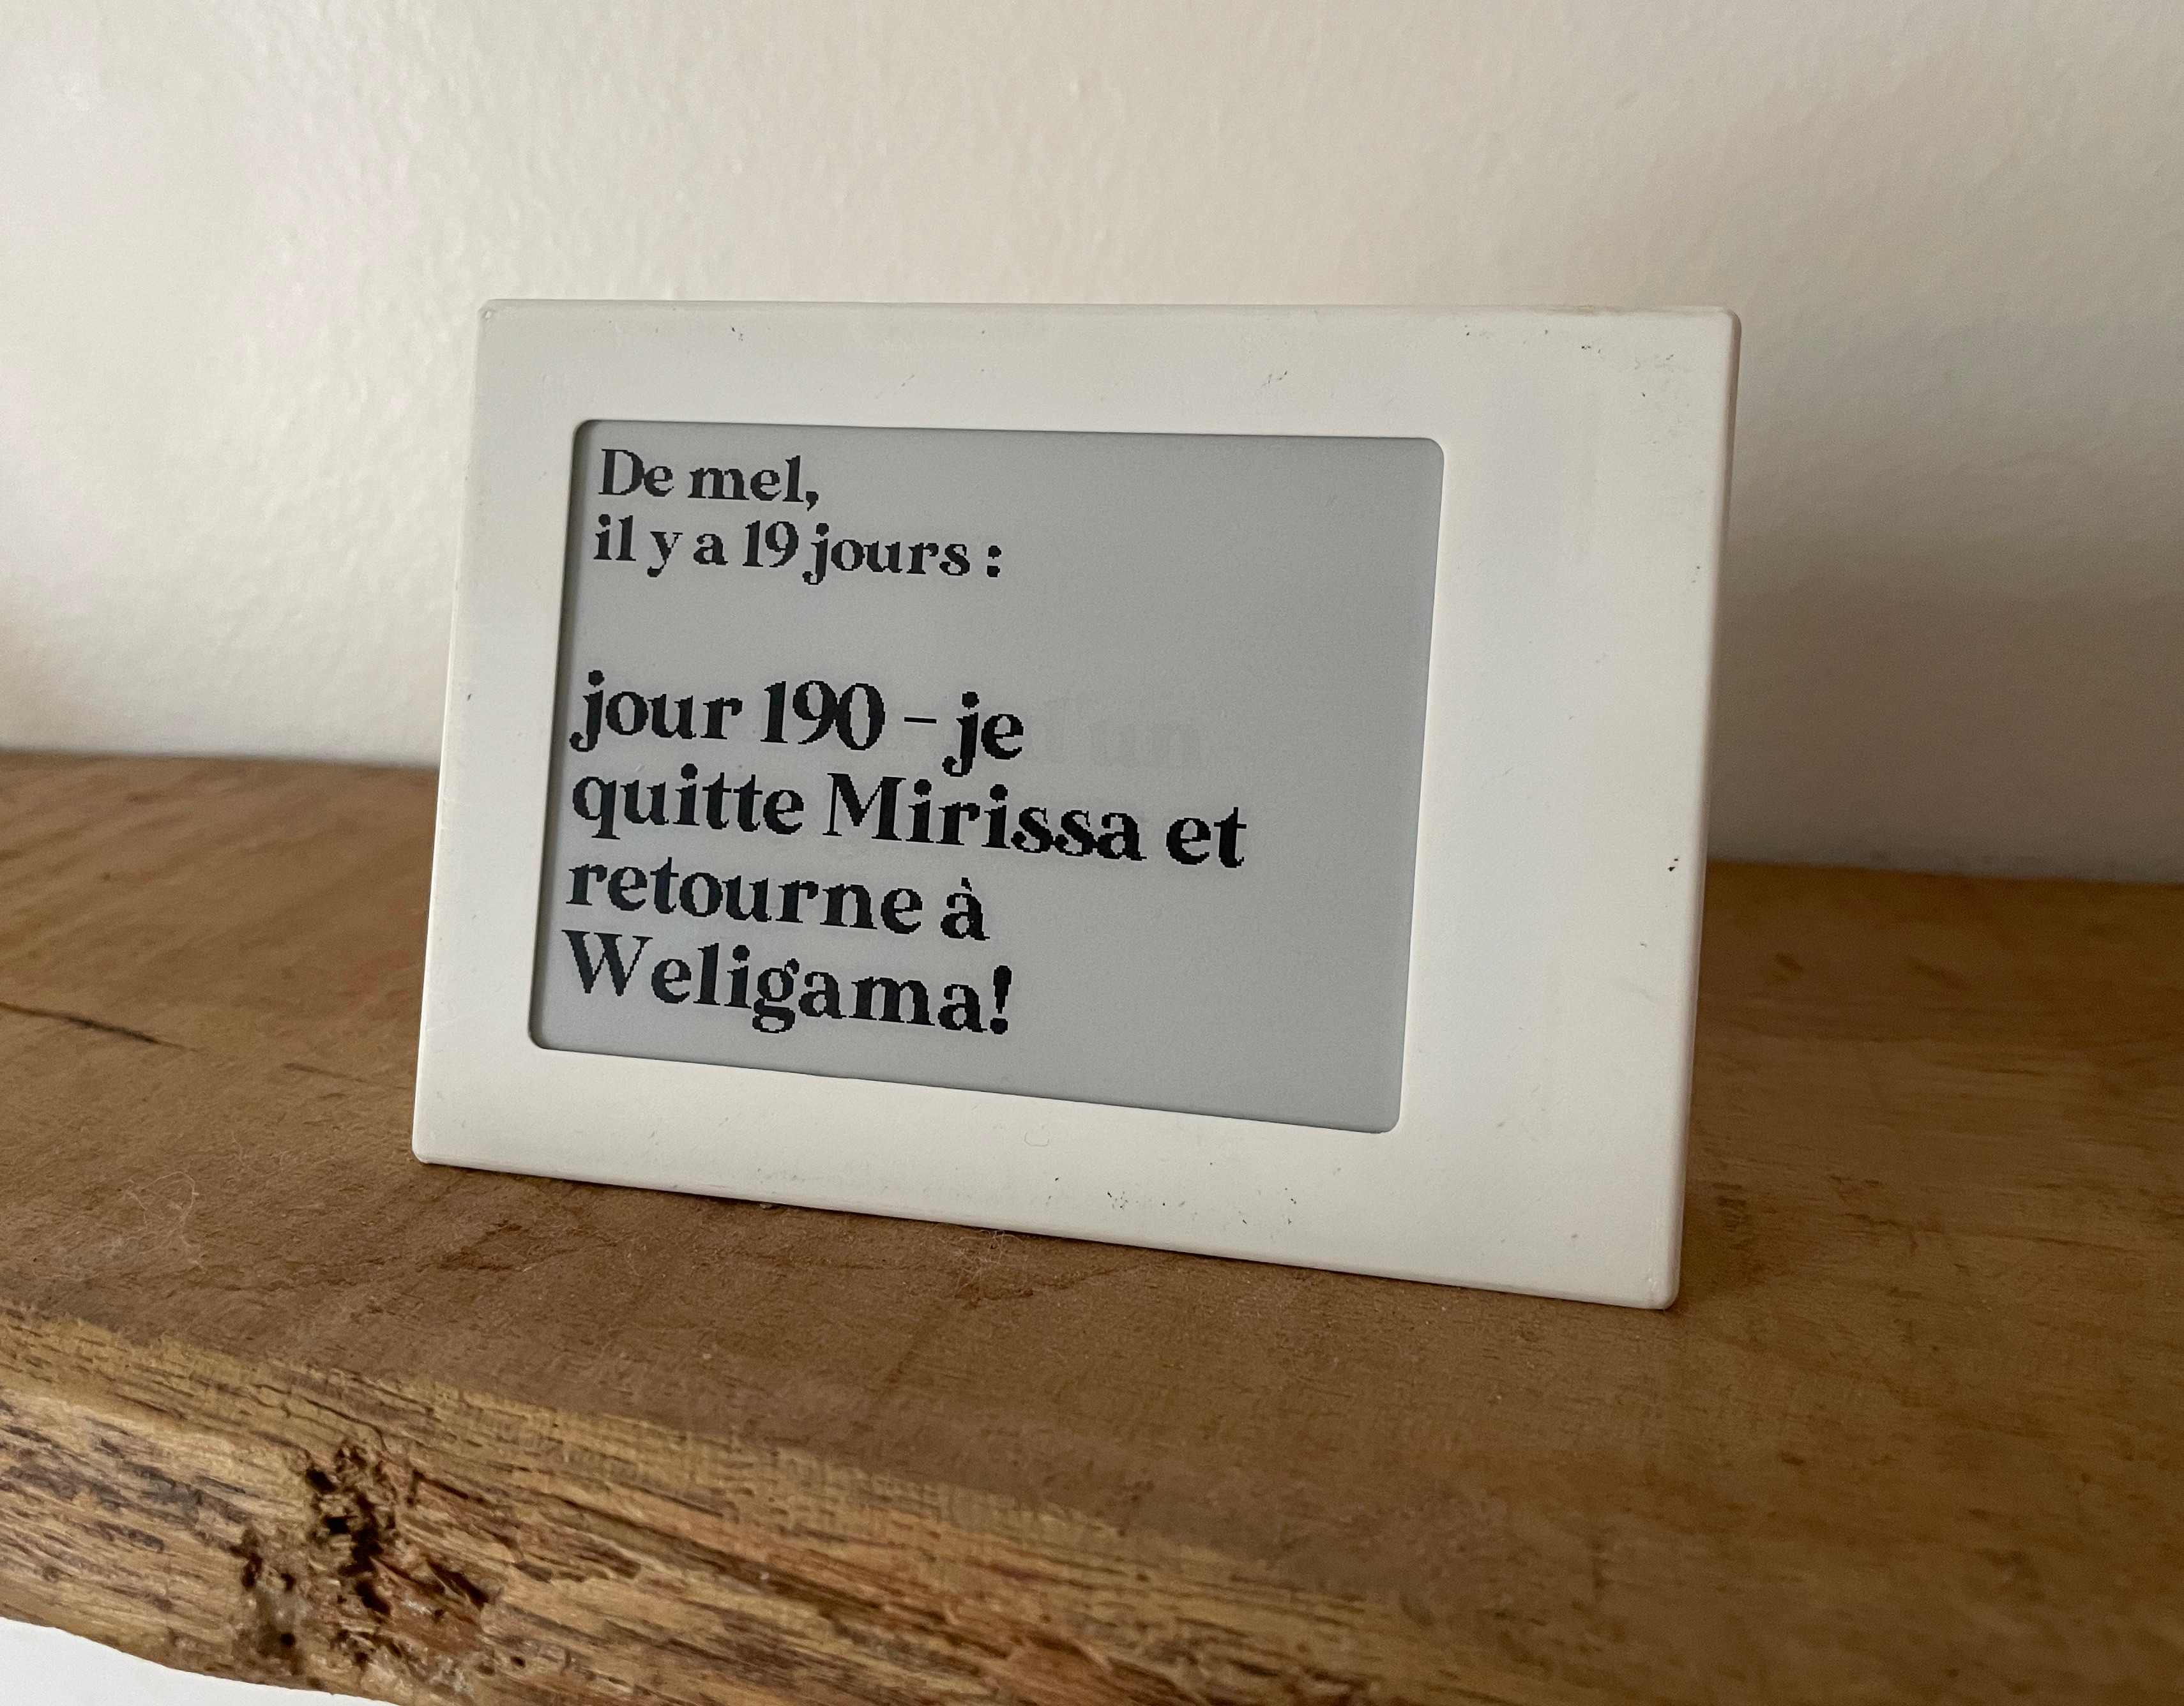
Transmit paper-like messages from 18000 kms away:
A simple, e-ink display that receives messages from loved ones from the other side of the globe.
why
About 10 months ago, my sister left our country to do a WHP (Work-Holiday-Program) on the other side of the world (fun fact, this is almost true as the antipodes of France where we live is right next to New-Zealand, where my sister went).
Going far today isn’t as bad as it would have been decades ago, we have messages, video calling and other new mediums that can bring people closer together even far away. This was important for all of us to still be able to connect, but I guess even more for my parents. So a few months in, I decided to create something different for them to know what she was up to, without needing their phones.
The idea came after seeing the Poem 1 concept, which is a ‘clock’, powered by ChatGPT and using a e-ink display. I I thought to myself that this form-factor and display could be a nice way of displaying messages from my sister. They wouldn’t diseappear, always readable from anywhere in a room.
So the goal was set: My sister would be able to send messages to the e-ink box at my parent’s, which would display them on the e-ink screen. How hard could it be ?
how
This project is made of various pieces:
- the physical ‘box’ that will be at my parent’s, receiving messages from a server and displaying them
- a server, that will let clients send messages through a simple front end
- a way for clients to connect to the server from anywhere in the world
The box
The first order of business was to find an E-ink display that would fit my requirements. I settled on a 4.2" unit from Waveshare: https://www.waveshare.com/4.2inch-e-paper-module.htm
The SPI interface would be controlled through a Raspberry Pi Zero W.
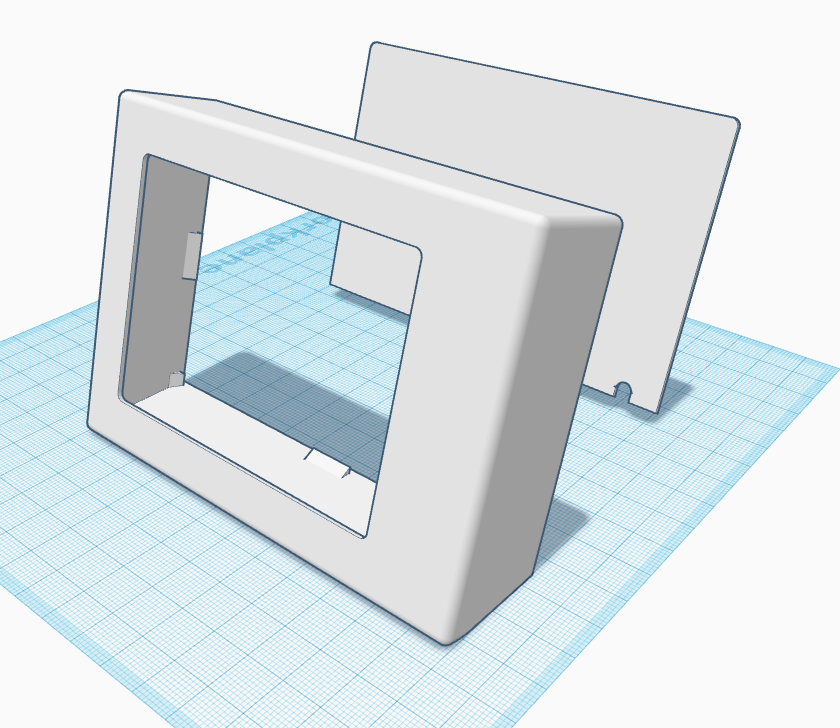
I then designed a 3D printed case that would fit the two components. As I don’t know anything about CAD design tools, I fiddled with Tinkercad until I had something that was both printable and not too ugly (I discovered why beveled and rounded edges are everywhere after printing my first ‘cubic’ version).
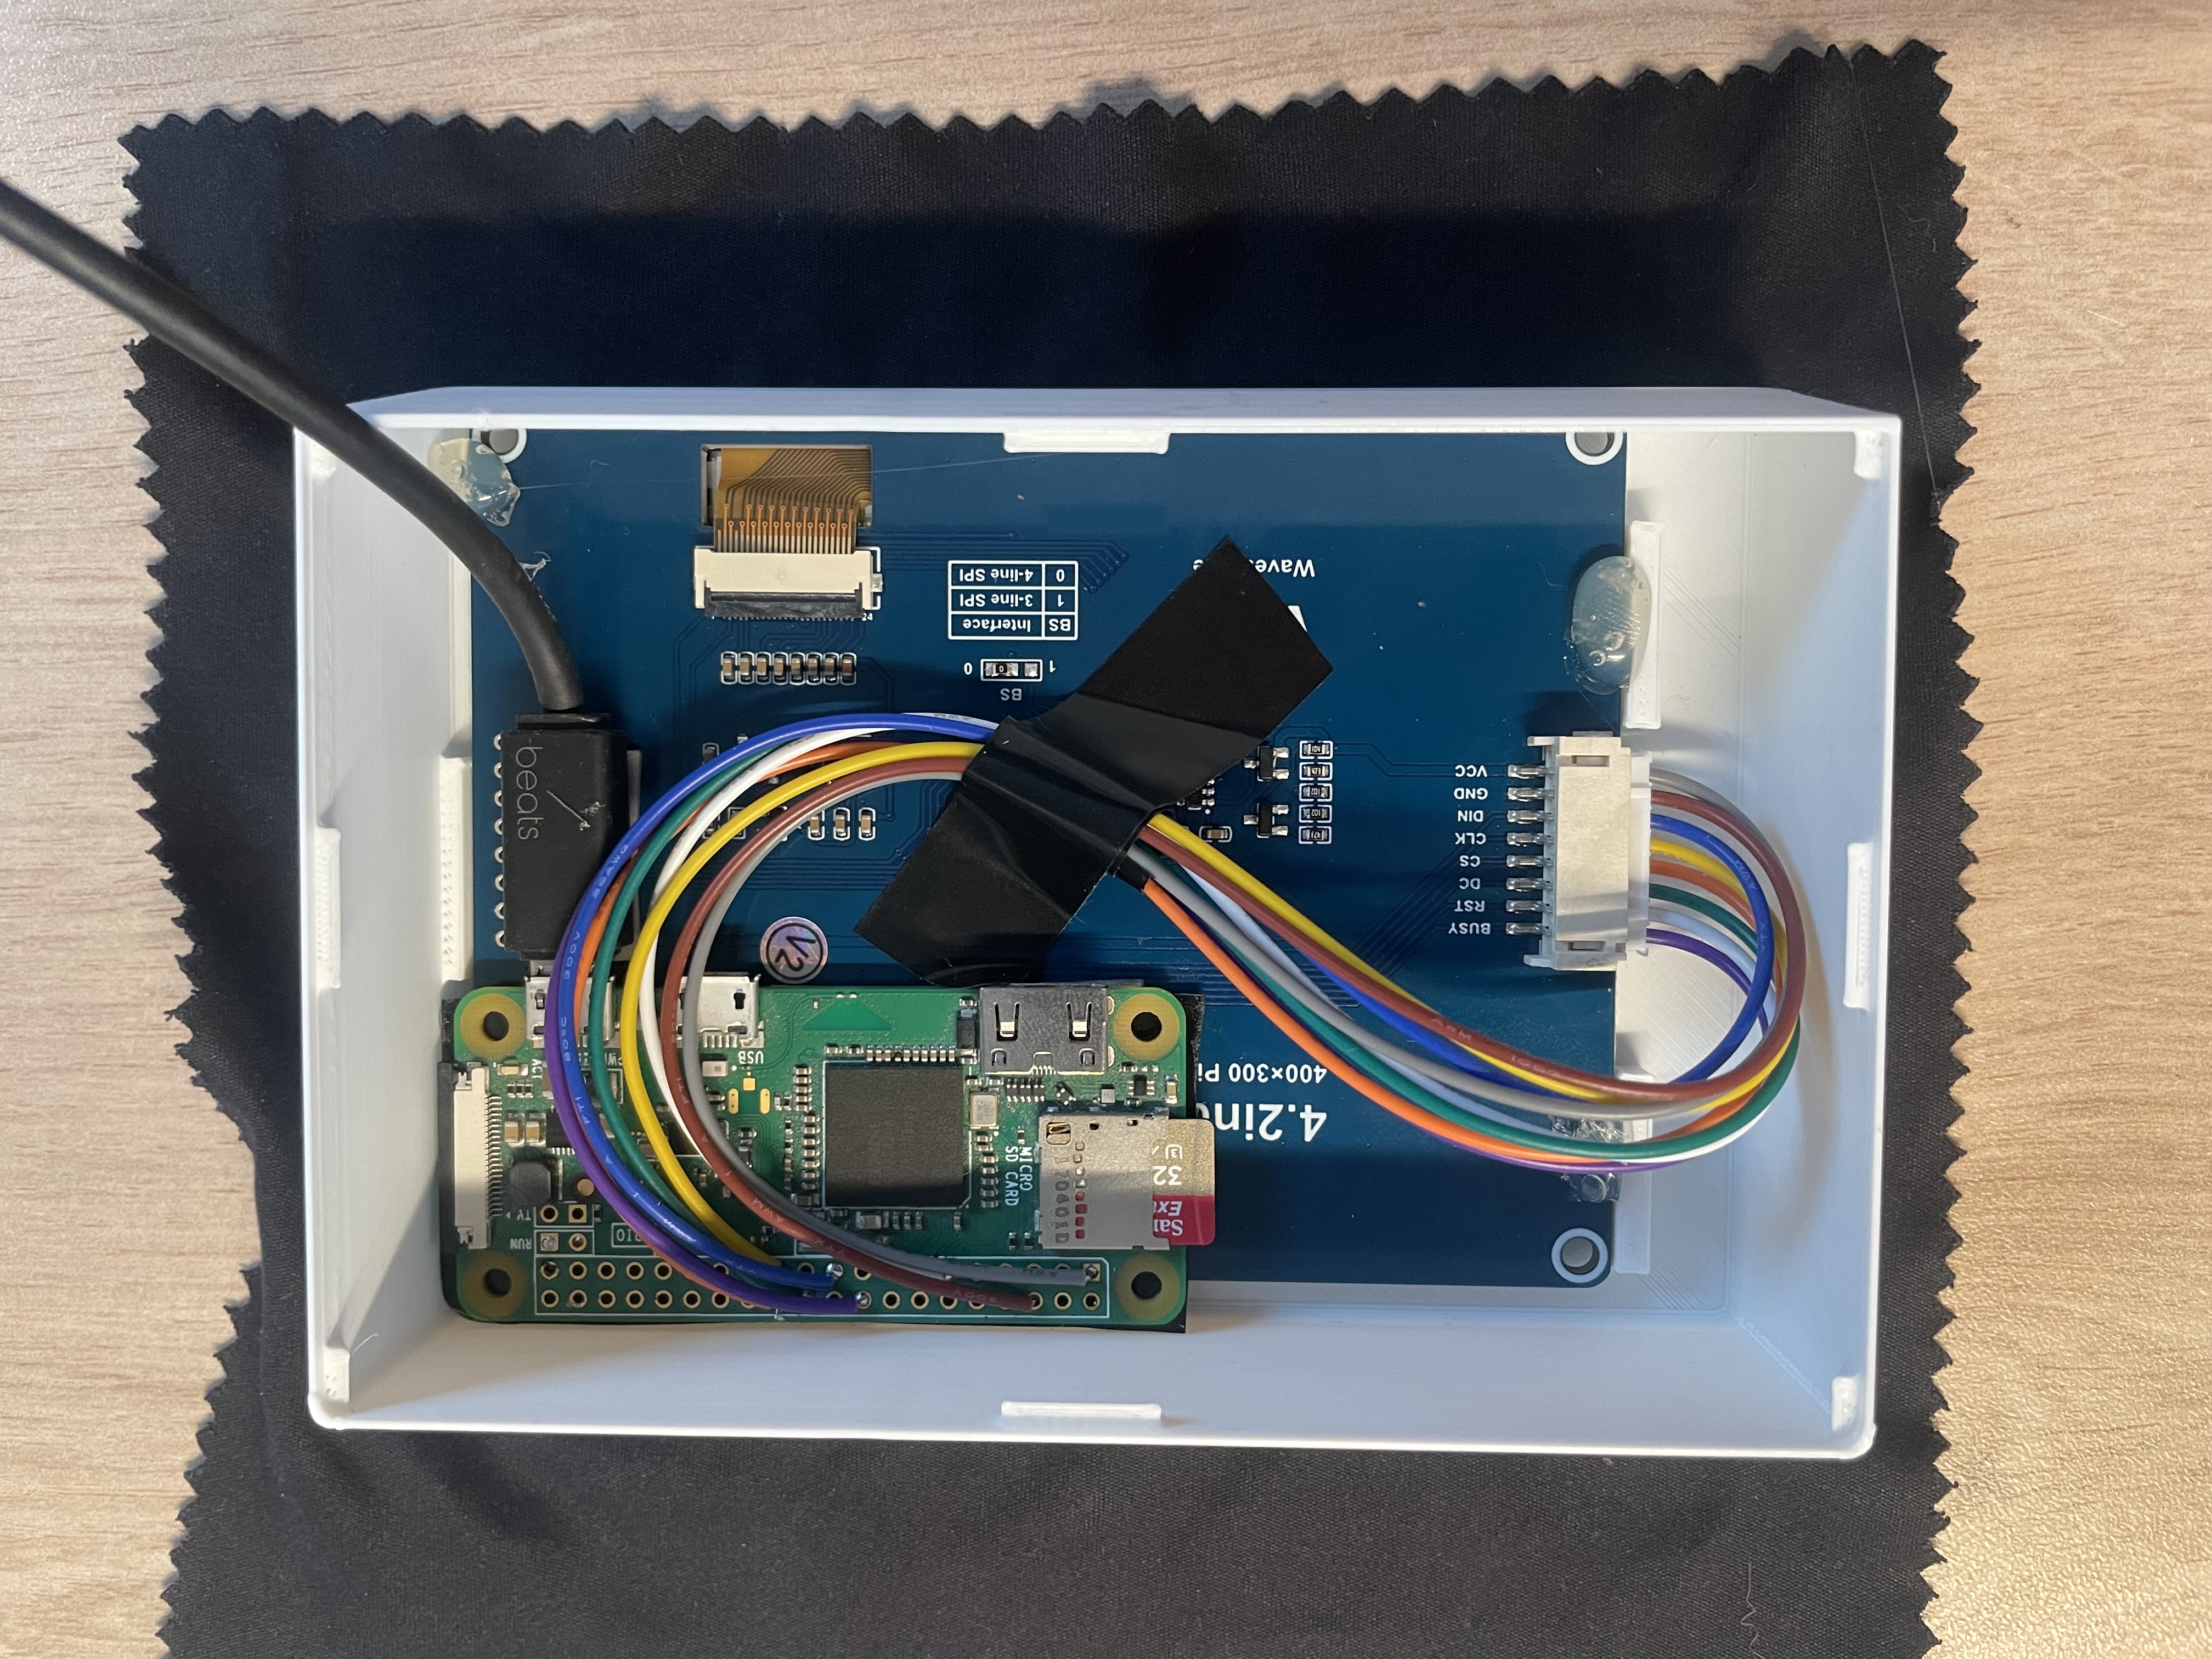
I then ‘assembled’ everything:
- soldered the wires from the display PCB to the pi W,
- fitted the display and pi inside the box (read double sided tape and hot glue)
Here is what it looks like inside:
After some sanding of the exterior of the box, it has quite a nice finish to it and looks decent enough:
Now that we have a working physical thing, onto the software !
the software
There’s multiple facets to consider:
- clients that should be able to send messages easily to a server
- the server that would store the messages (and pictures, because I decided mid-project that sending pictures to the display would be fun)
- the logic to display nicely the message and when it was sent on the display.
the frontend
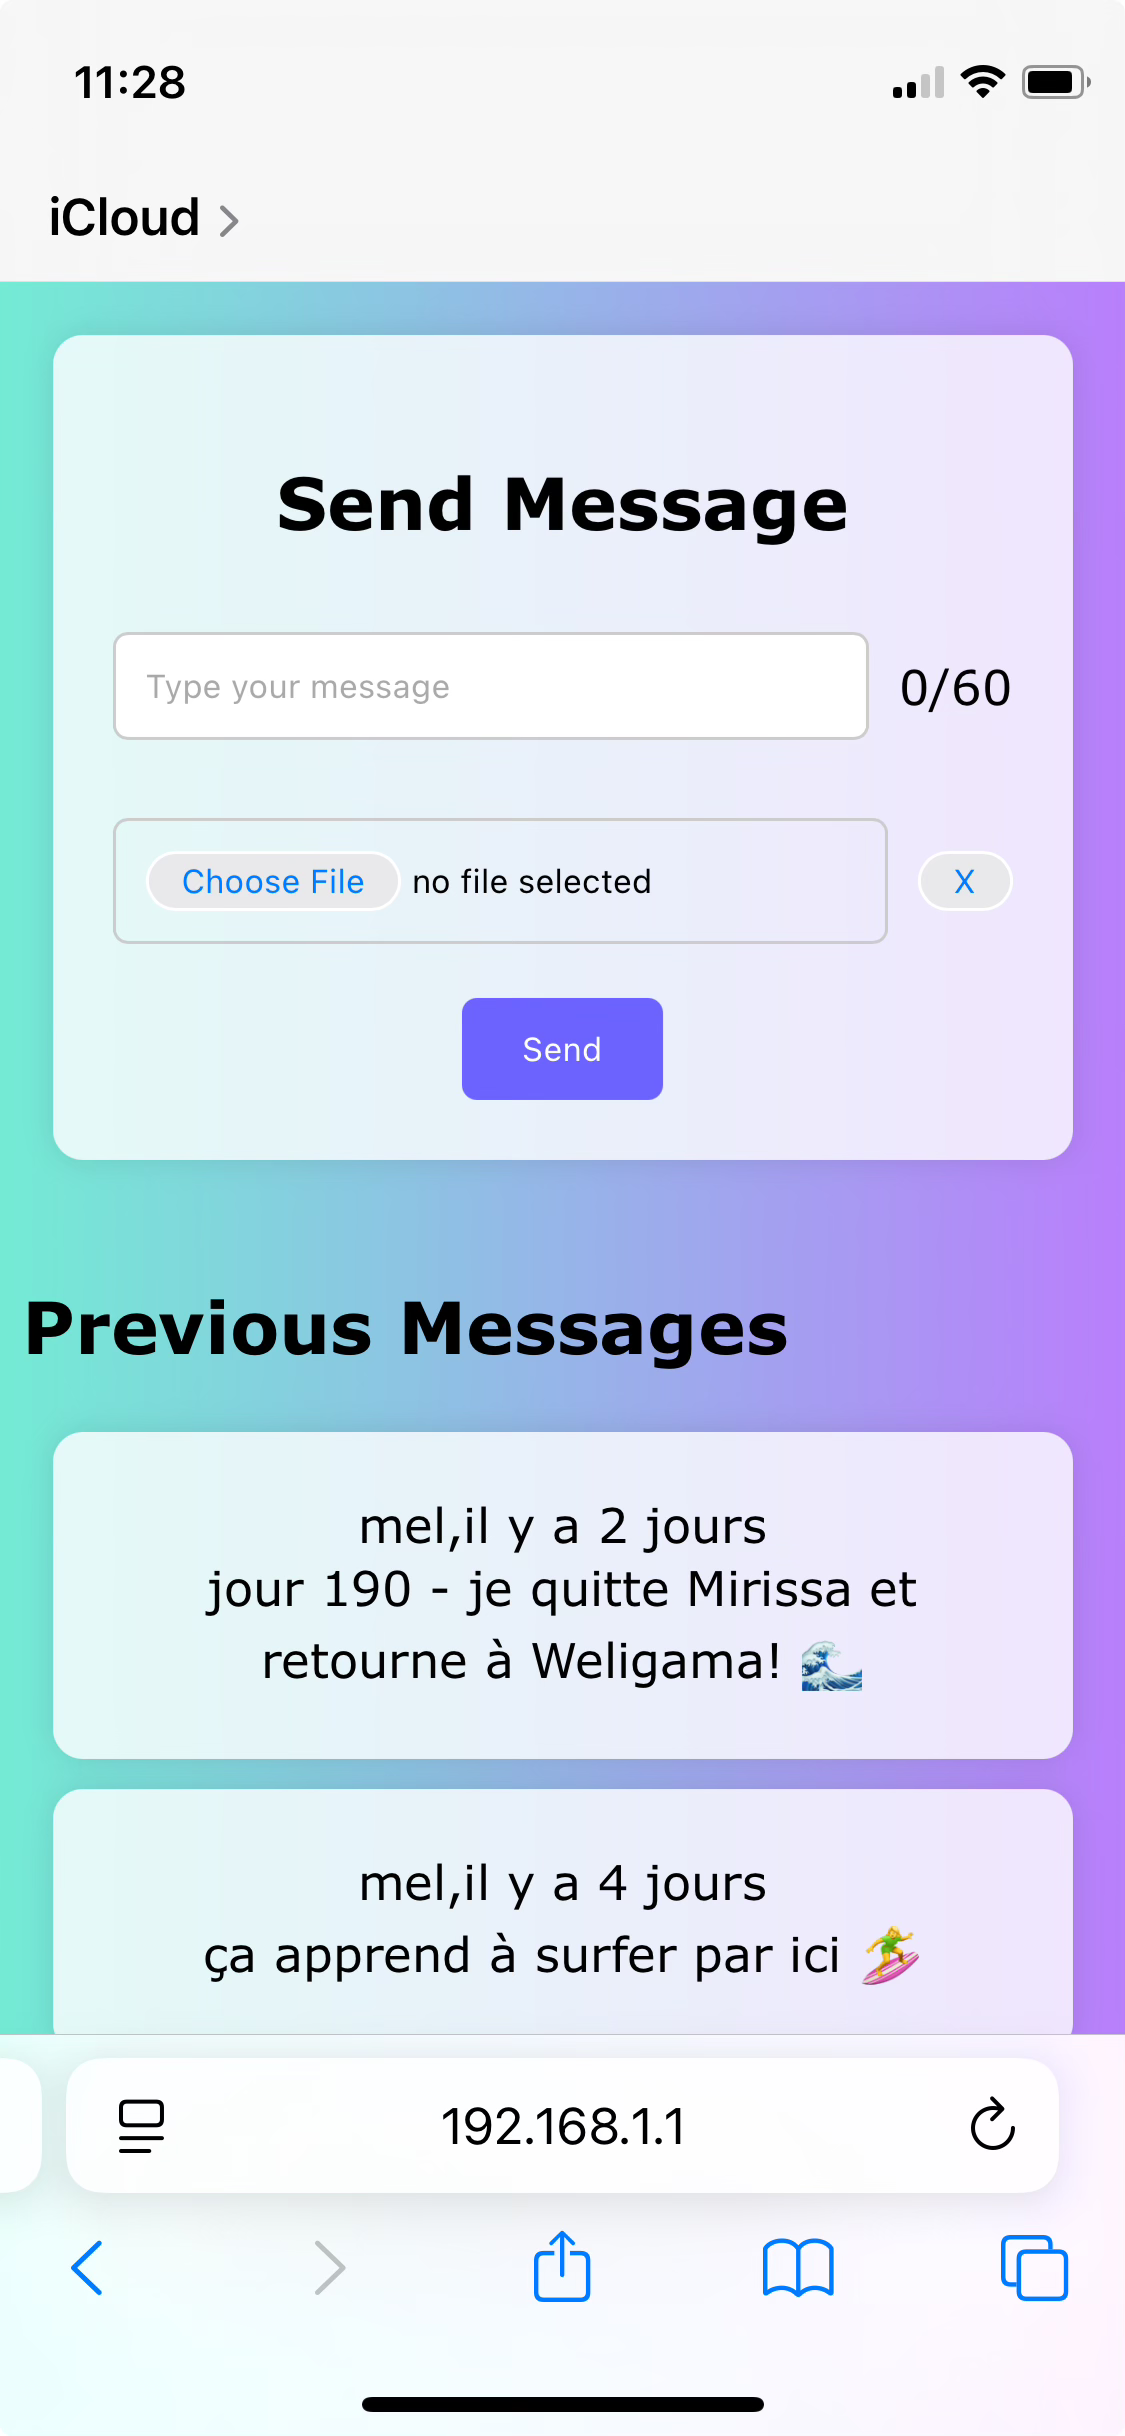
The first part was a nice challenge. I’m not a frontend engineer, and have very limited design abilities (as seen previously on the box’s design). I decided that the frontend would be entirely developed (ie the code) by chatGPT. I wanted to see if it was possible to create the whole frontend design and logic using only AI. The features of the frontend would be as follows:
- authenticate using basic auth
- a simple form to send a new message/image
- display the list of previouly sent messages
Here is the first message of a long conversation between me and chatGPT:
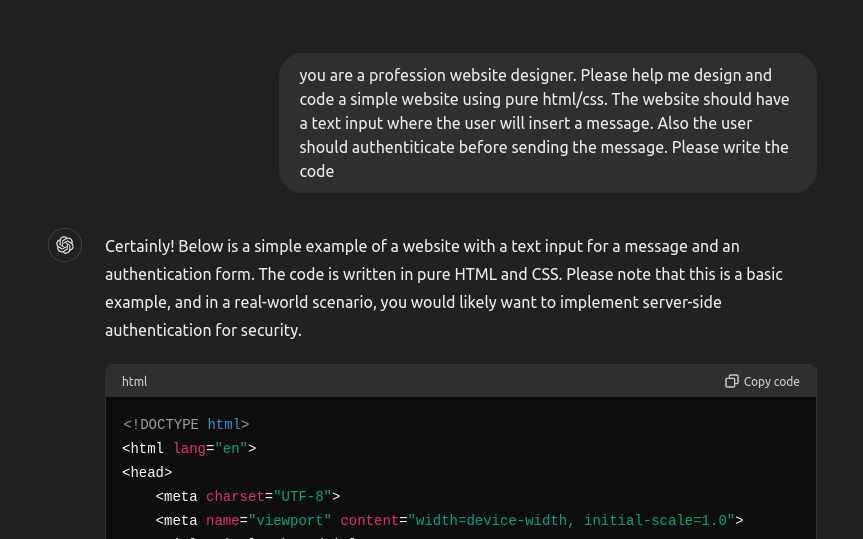
We then refined the UI, implemented the various features (when I say we, I mean I expressed what I wanted, or wrote feedback on the previous iteration).
Here is a quick list of features that chatGPT implemented on its own:
- all the design, including the nice background gradient
- handling the requests to the backend server
- displaying the previous messages from a GET endpoint
- Adding support for uploading images
- the little character counter next to the input
The only feature that it wasn’t able to code properly is the button for removing the selected image.
Finally, here is what the UI looks like on a phone :
I would say that 95% of the code was written by gpt, and a few tweaks and corrections by me. Obviously it’s quite a simple use-case, but it delivered something I would have spent 3 weeks dealing with CSS centering.
10/10 experience.
the server
So this frontend talks to a python backend. Nothing fancy. The data is stored using tinyDB, as an array:
    "32": {
      "timestamp": 1711017153,
      "user": "mel",
      "display": "8b74c00a-1093-41da-89ad-a17aabcbbf98",
      "message": "\u00e7a apprend \u00e0 surfer par ici \ud83c\udfc4\u200d\u2640\ufe0f"
    },
    "33": {
      "timestamp": 1711513109,
      "user": "mel",
      "display": "8b74c00a-1093-41da-89ad-a17aabcbbf98",
      "message": "jour 190 - je quitte Mirissa et retourne \u00e0 Weligama! \ud83c\udf0a"
    }
Creating a new message is a POST request. We grab the username, timestamp, message/image, create a UUID for the image and stores it locally. The convert/thumbnail is here to format the image to be then displayed on the e-ink screen. You can imagine the GET endpoint for the display, it’s simply returning the last entry of the messages.
@api.post("/messages")
async def new_message(resp: Response,request:Request,user= Depends(auth_check)):
    form = await request.form()
    msg = {"timestamp":int(time()),"user":user}
    if img := form.get("image"):
        im = Image.open(BytesIO(img.file.read()))
        image = im.convert("L")
        image.thumbnail((368,200))
        im_uuid = str(uuid4())
        image.save(f"./static/imgs/{im_uuid}.jpg")
        msg["image"] = im_uuid
        msg["message"] = "image"

    if message := form.get("message"):
        msg["message"] = message

    messages.insert(msg)
    return "ok"
the network
Ok so we have clients, a server, and a display, all on different part of the world. The clients are roaming (mainly my sister across the globe), the server is on my rasberry pi at home, and the display is at my parent’s. I almost went the cloud way, with a hosted, public server, but that would mean spending time to enhance the app’s security, setting up proper auth, etc etc. Quite a hassle for this. So I decided to put tailscale to the test. It’s a mesh VPN that allows peers to connect to each other directly using p2p tunnels.
All of the clients would have tailscale installed, configured to be on my tailnet, and rules configured to that my sister’s phone and the display could talk to the server. Each of them have a static IP in this subnet
This would then look like this:
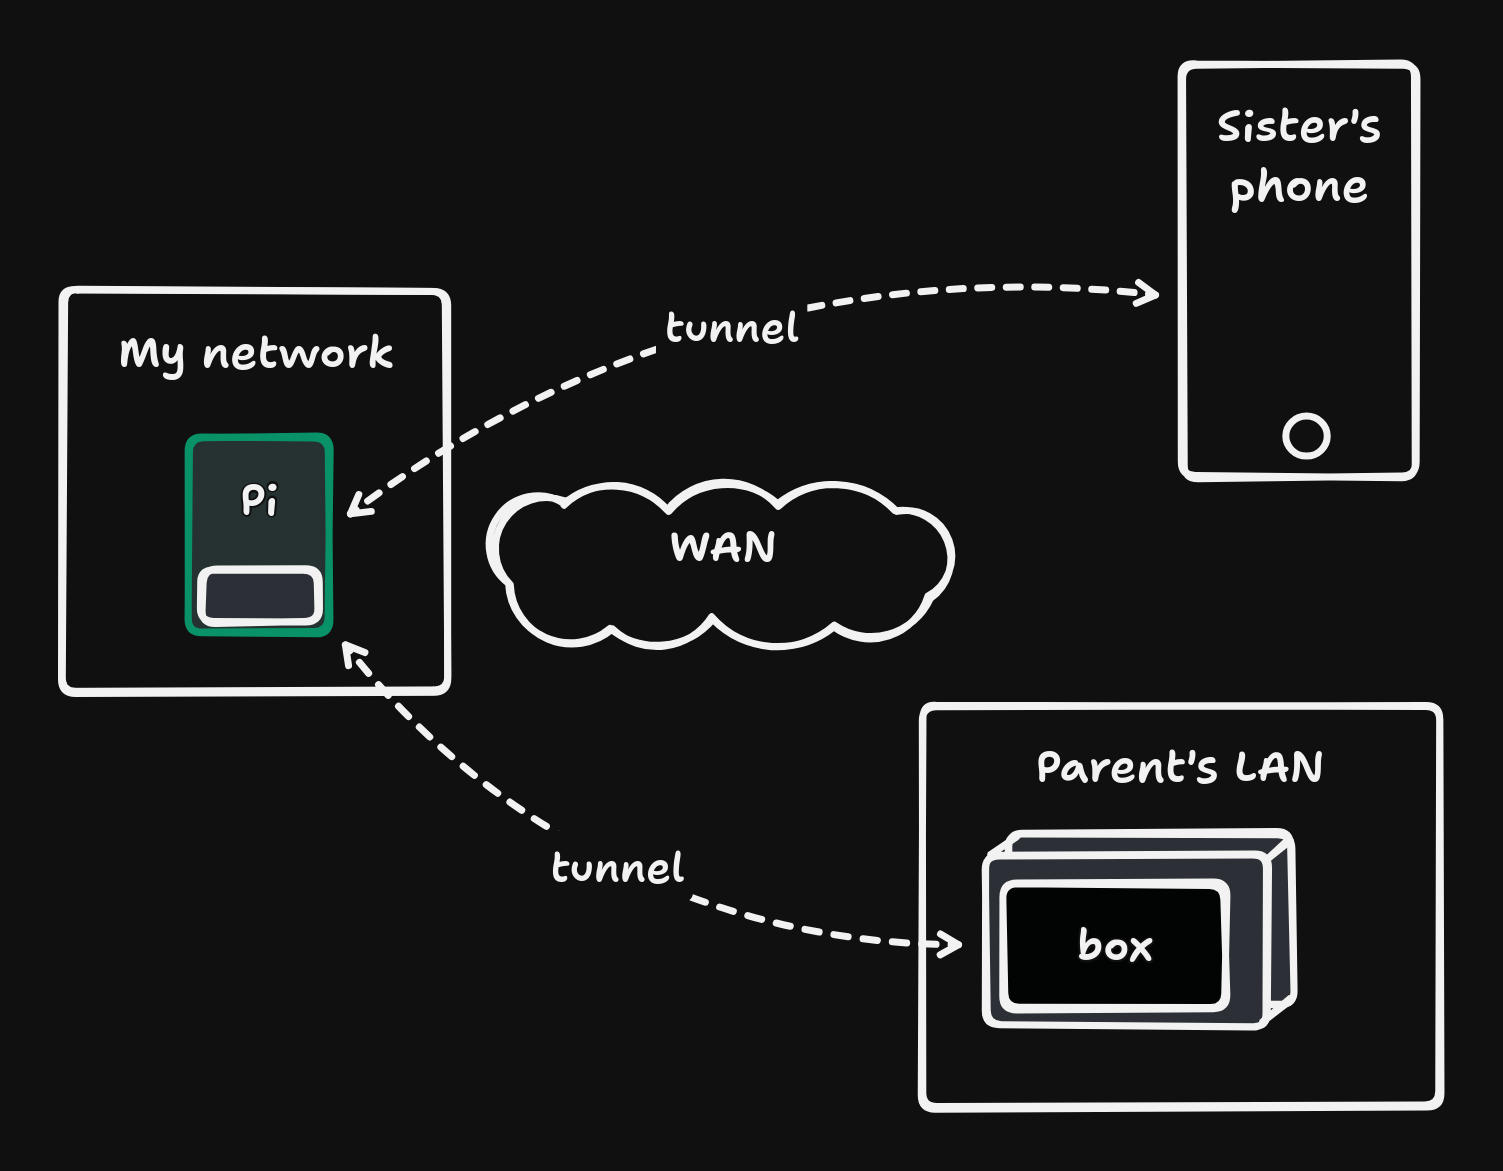
Now, both my sister’s phone and the display can access the frontend exposed by my server, without having to expose it publicly. My sister ‘only’ have to remember to turn on the VPN whenever she wants to send a message.
the display
On the display side, it’s a simple while loop:
- fetch the API for the latest message
- sleep like 10 minutes
Again, nothing fancy. Doesn’t matter if the message isn’t received instantaneously:
The library for controlling the actual display (https://github.com/waveshareteam/e-Paper) is quite well made. But for some reason the packaging was broken, so I downloaded the package and included it like this waveshare-epaper @ file:///app/waveshare_epaper-1.3.0-py3-none-any.whl in my requirements.
Another hurdle I encountered was figuring out how to wrap properly the message if it was too long for a single line. But that has more to do with the font that I used being clearly not monospaced. Fiddling around with arbitrary values to find the exact number of pixels are needed to space things around is always fun !
What’s interesting here it that the lib is Pillow based, meaning you construct your image then sends it to the display:
(you can see my experiment with dark/light mode)
def refresh_display(user="",date="",content=None,dark_theme=False):
    bg_color = 0 if dark_theme else 255
    color = 255 if dark_theme else 0

    Limage = Image.new('1', (epd.width,epd.height), bg_color)
    draw = ImageDraw.Draw(Limage)
    epd.display_Partial(epd.getbuffer(Limage))

    # blank bg
    draw.rectangle((0, 0, epd.width,epd.height), fill = bg_color)

    # from
    draw.text((12, 20), user, font = font_35,fill = color)
    draw.text((12,50),date,font = font_35, fill = color)
    if isinstance(content,Image.Image):
        img_w, _ = content.size
        img_x = int((400 - img_w)/2)
        Limage.paste(content, (img_x,100))
    elif isinstance(content,str):
        # message
        line_start_y,line_height = 120,40
        lines = textwrap.wrap(content, 18,max_lines=4)
        for i,l in enumerate(lines):
            draw.text((12, line_start_y+i*line_height), l, font = font_50, fill = color)

    epd.display_Partial(epd.getbuffer(Limage))
I played around with various refreshes, because e-ink displays can partially refresh (change only the pixels that changed) or a full (clearing the screen in-between). The partial is quicker, but overtime ghosts of previous images can be visible. So a full refresh is done once in a while.
For the date on top the messages, I used the humanize lib to convert epoch timestamps to human-friendly format in French.
how it turned out
Again, here is the final result:
Quite pleased with this one. Mixing hardware and software always hits different, and ‘seeing’ messages being sent literaly across the globe has a very satisfying taste to it.